지난 포스팅에서는 LINQ를 사용해 데이터를 조회하는 방법을 배웠습니다.
이번 글에서는 마이그레이션을 활용해 데이터베이스 구조를 변경하고,
추가된 열에 데이터를 삽입 및 조회하는 과정을 살펴보겠습니다.
1. 데이터베이스 구조 변경하기
1.1 Product 클래스 수정
기존 Product 클래스에 Description 속성을 추가합니다.
namespace EFCoreDemo.Model;

public class Product
{
    public int Id { get; set; }

    public string Name { get; set; } = string.Empty;

    public int Price { get; set; }

    public string Description { get; set; } = string.Empty; // 추가된 속성
}
Description 속성은 제품의 설명을 저장하며 기본값을 빈 문자열로 설정했습니다.
이는 데이터가 없는 기존 레코드에서 NullException을 방지하기 위한 조치입니다.
2. 마이그레이션 생성 및 확인
2.1 마이그레이션 파일 생성
아래 명령어를 실행해 모델 변경 사항을 반영한 마이그레이션 파일을 생성합니다.
dotnet ef migrations add AddDescriptionToProduct
2.2 생성된 마이그레이션 파일
명렁어 실행 후 Mirgration 폴더에 새로운 파일이 생성됩니다.
생성된 파일에는 새로운 열을 추가하거나 제거하는 코드가 포함되어있습니다.
(명령어를_실행한_시기의_Datetime)_AddDescriptionToProduct

using Microsoft.EntityFrameworkCore.Migrations;

#nullable disable

namespace EFCoreDemo.Migrations
{
    /// <inheritdoc />
    public partial class AddDescriptionToProduct : Migration
    {
        /// <inheritdoc />
        protected override void Up(MigrationBuilder migrationBuilder)
        {
            migrationBuilder.AddColumn<string>(
                name: "Description",
                table: "Products",
                type: "nvarchar(max)",
                nullable: false,
                defaultValue: "");
        }

        /// <inheritdoc />
        protected override void Down(MigrationBuilder migrationBuilder)
        {
            migrationBuilder.DropColumn(
                name: "Description",
                table: "Products");
        }
    }
}
Up: Descrption 열을 추가합니다.
Down: 마이그레이션을 되돌릴 때 Description 열을 삭제합니다.
3. 데이터베이스 업데이트
3.1 데이터베이스 동기화
아래 명령어로 생성된 마이그레이션을 데이터베이스에 적용합니다.
dotnet ef database update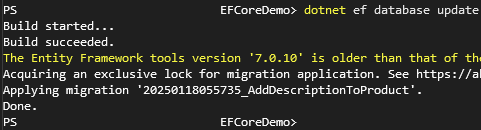
명령이 성공적으로 실행되면 Products 테이블에 Description 열이 추가됩니다.
4. 데이터 추가 및 조회
4.1 기존 데이터 조회
추가된 열이 포함된 데이터를 조회하기 위해 메서드를 수정합니다.
static void ReadAllProducts()
{
    using var context = new EFCoreDemoDbContext();

    var products = context.Products.ToList();
    Console.WriteLine("제품 목록");
    foreach (var product in products)
    {
        Console.WriteLine($"Name: {product.Name}, Price: {product.Price}, Description: {product.Description}");
    }
}
결과
제품 목록
Name: Laptop, Price: 1500, Description:
Name: Tablet, Price: 800, Description:
Name: Smartphone, Price: 1200, Description:
Name: Headphones, Price: 200, Description:
위처럼 결과가 나오지 않았나요?
Description 속성이 생기기 이전에 들어간 데이터들은 Description 데이터가 없으니 위 결과처럼 나오게됩니다.
4.2 새 데이터 추가
새로운 데이터를 추가하기 위해 아래 메서드를 작성합니다.
static void AddProduct()
{
    using var context = new EFCoreDemoDbContext();
    context.Products.Add(new Product
    {
        Name = "Earphone",
        Price = 100,
        Description = "Electrical device worn on the ear to receive radio."
    });
    context.SaveChanges();
}
Main 메서드에서 AddProduct와 ReadAllProducts를 호출합니다.
static void Main()
{
    AddProduct();
    ReadAllProducts();
}
결과
제품 목록
Name: Laptop, Price: 1500, Description:
Name: Tablet, Price: 800, Description:
Name: Smartphone, Price: 1200, Description:
Name: Headphones, Price: 200, Description:
Name: Earphone, Price: 100, Description: Electrical device worn on the ear to receive radio.
5. 마치며
이번 글에서 배운 것을 요약해보겠습니다.
모델 클래스를 수정해 새로운 열을 추가하는 방법.
마이그레이션을 생성하고 데이터베이스를 업데이트하는 과정.
추가된 열에 데이터를 삽입 및 조회하는 방법.
다음 포스팅에서는 엔티티 간 관계를 설정하고, 1:1 관계를 매핑하는 방법을 다뤄보겠습니다.
'Entity Framework' 카테고리의 다른 글
| 엔티티 프레임워크(Entity Framework) 1:N 관계 매핑 (0) | 2025.01.22 |
|---|---|
| EF 1:1 관계 매핑 이해하기 (0) | 2025.01.20 |
| Entity Framework를 활용한 CRUD 작업 (0) | 2025.01.15 |
| LINQ로 간편하게 데이터 조회하기 (0) | 2025.01.15 |
| Entity Framework 시작하기 - 설치 및 설정 (0) | 2025.01.13 |